
Replacing the Headband and Ear Pads on the MDR-1RBT Headphones
- blog
- December 24, 2025
Hey guys!
It’s Juke here.
This time, I’ll explain how to replace the headband and ear pads on the MDR-1RBT headphones!
Check out my video for detailed steps.
Video
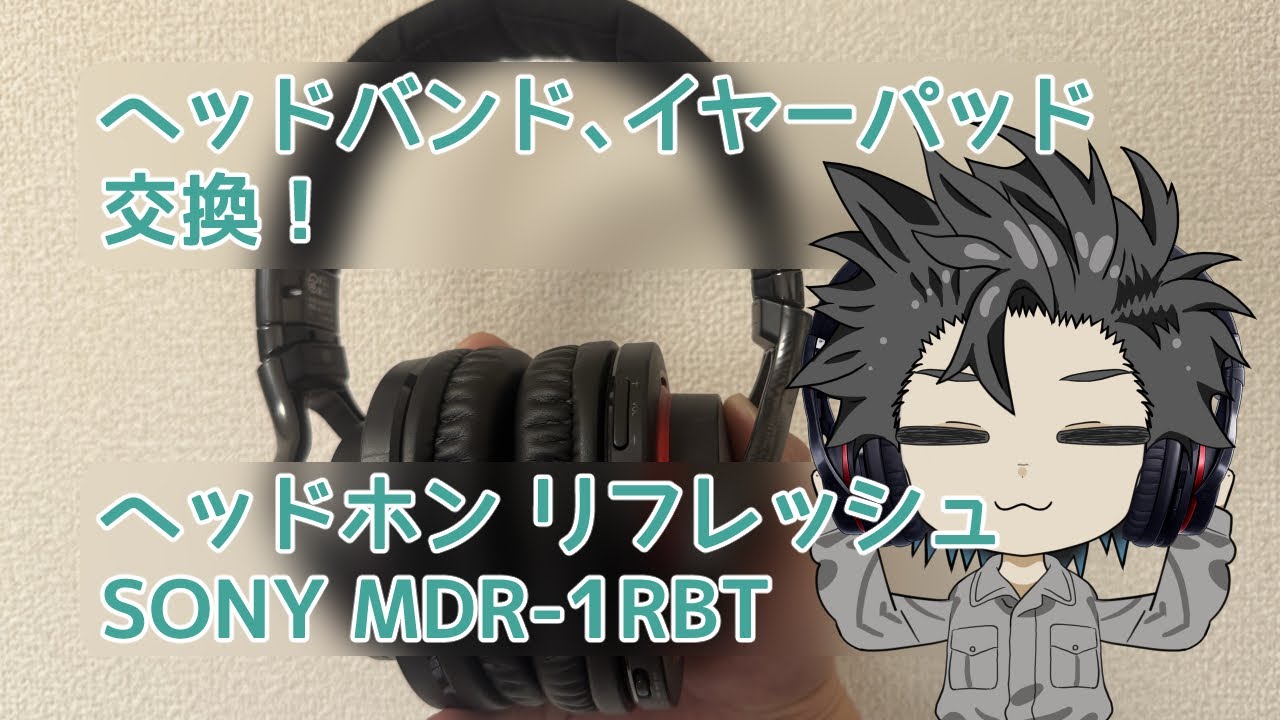
【Fix】 SONY Headphone MDR-1RBT refresh - Headband and Ear-pads replacement 【JUKE UNOTSUKI】
Headband manufacturing policy
The dimensions of the headband removed here are as follows.
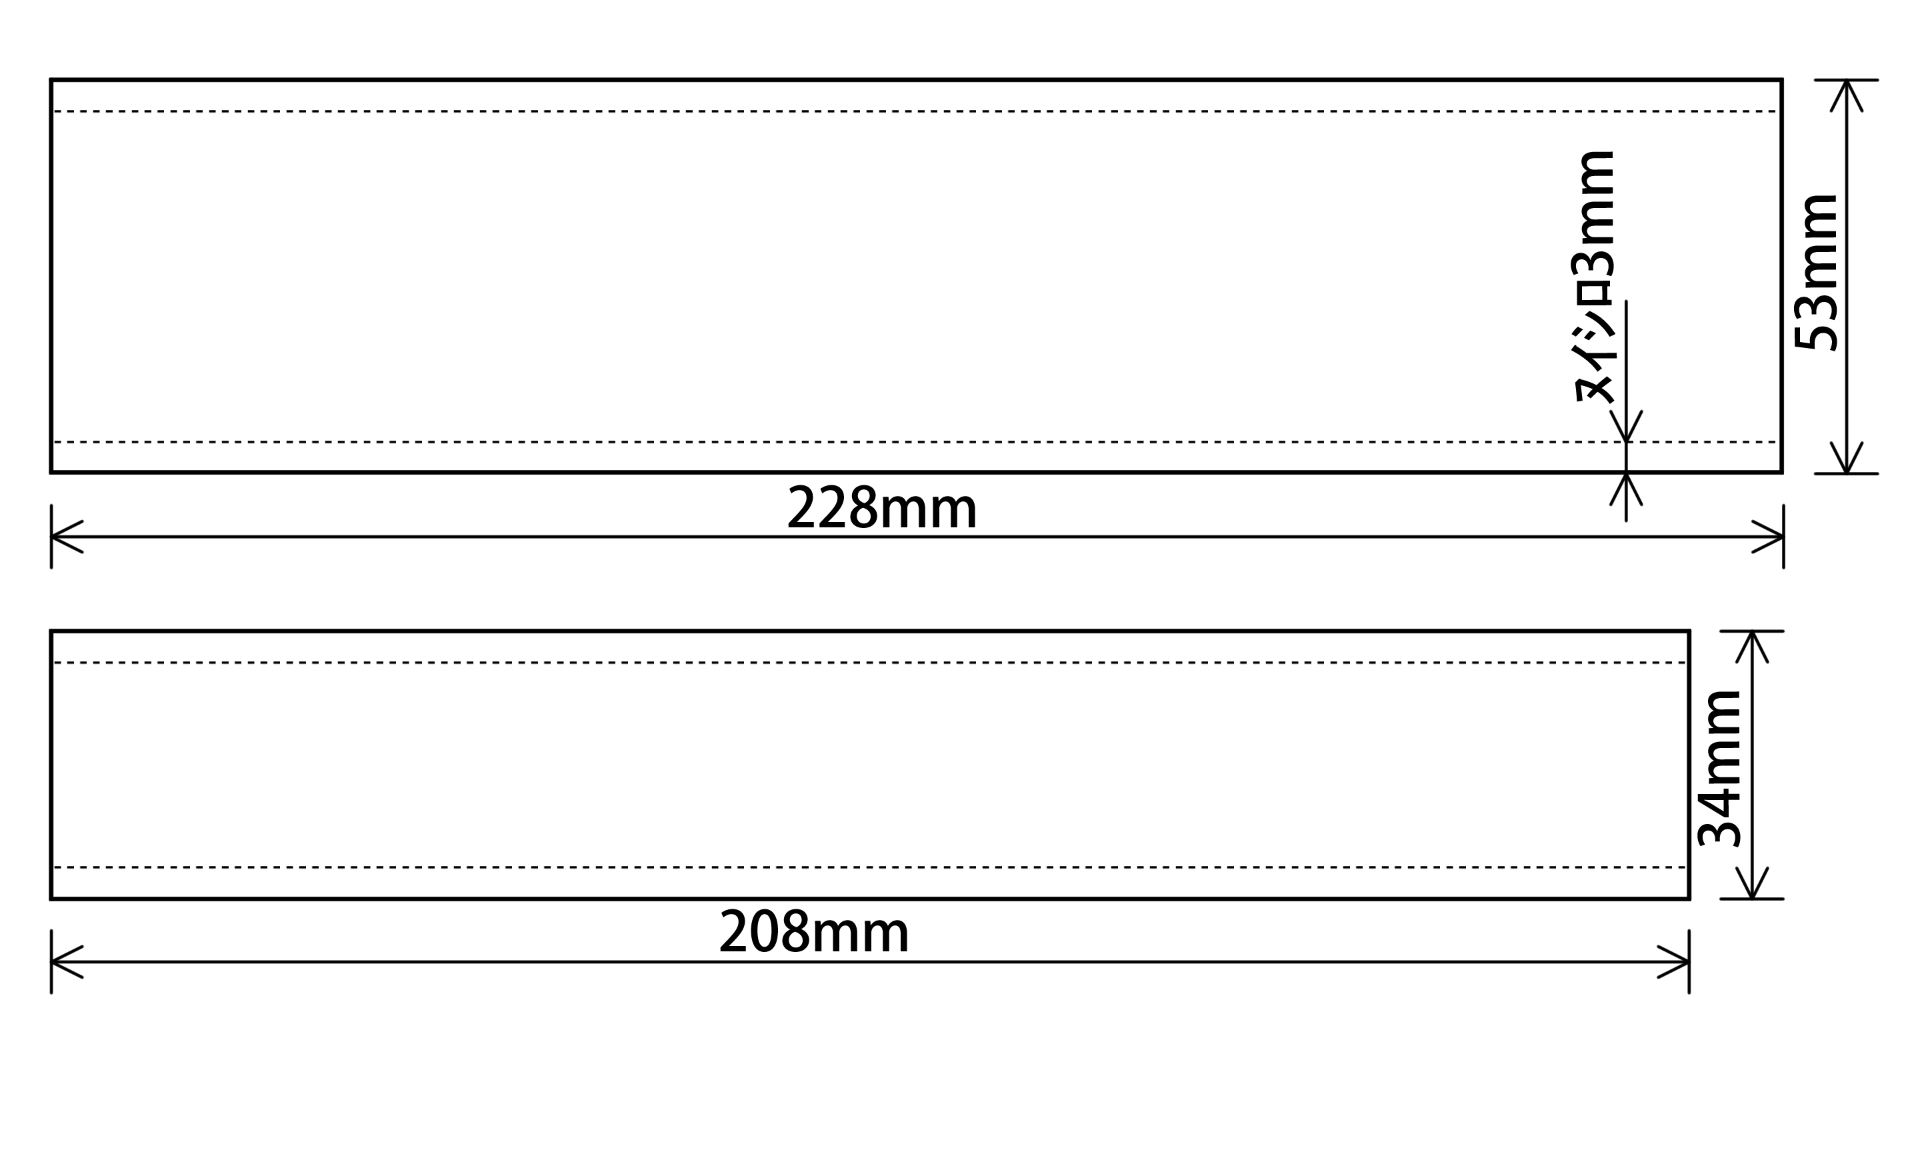
Based on this, modify it as shown below so it can be sewn onto the headband.
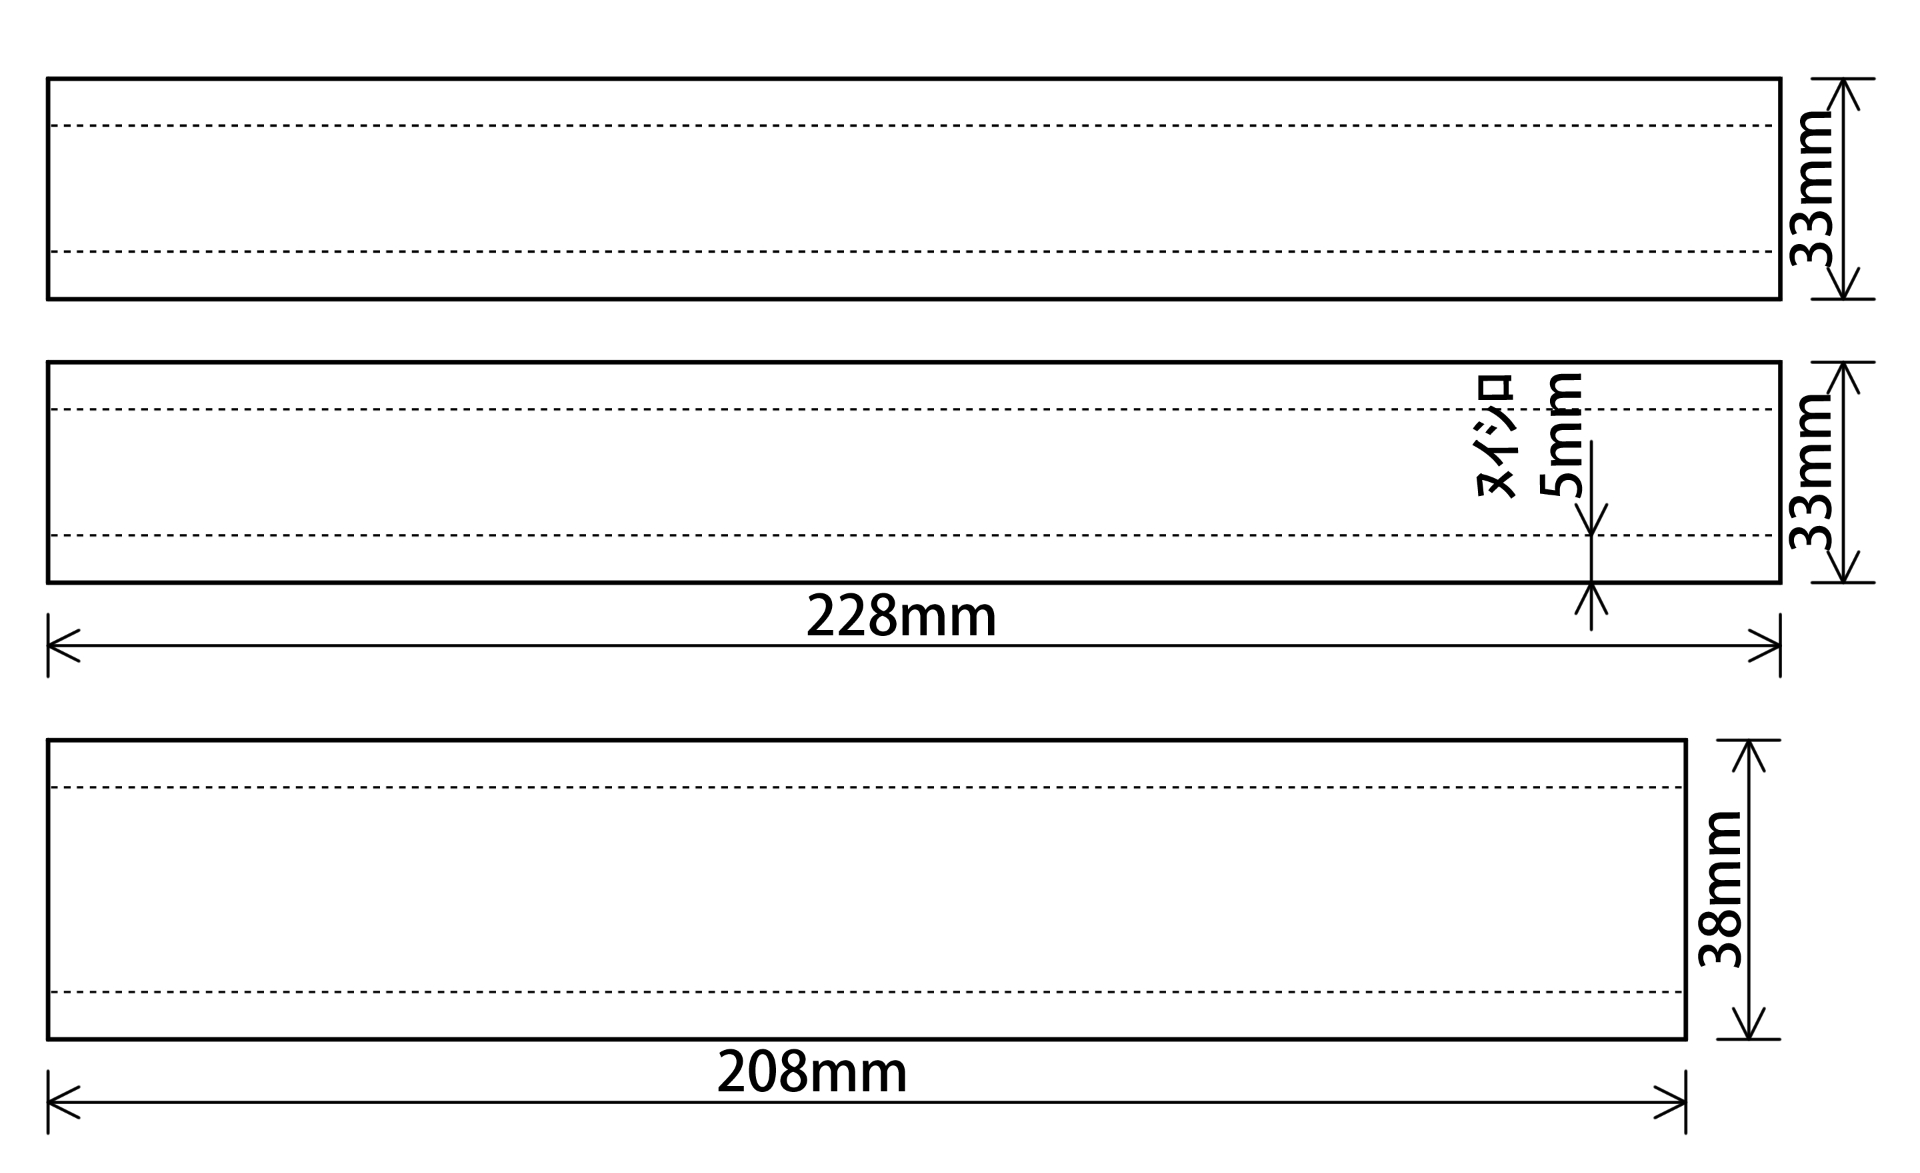
The upper fabric of the headband has been split into two sections, with the seam allowance for each changed from 3mm to 5mm.
While hand sewing might be manageable, it’s difficult for an amateur to sew straight with a 3mm seam allowance.
With a 5mm seam allowance, it should still take shape even if it’s a bit crooked.
About “U-shaped stitch”
Next up is the “U-shaped stitch”.
For the U-shaped stitch, it’d probably be easier to understand if you check out other videos instead of mine.
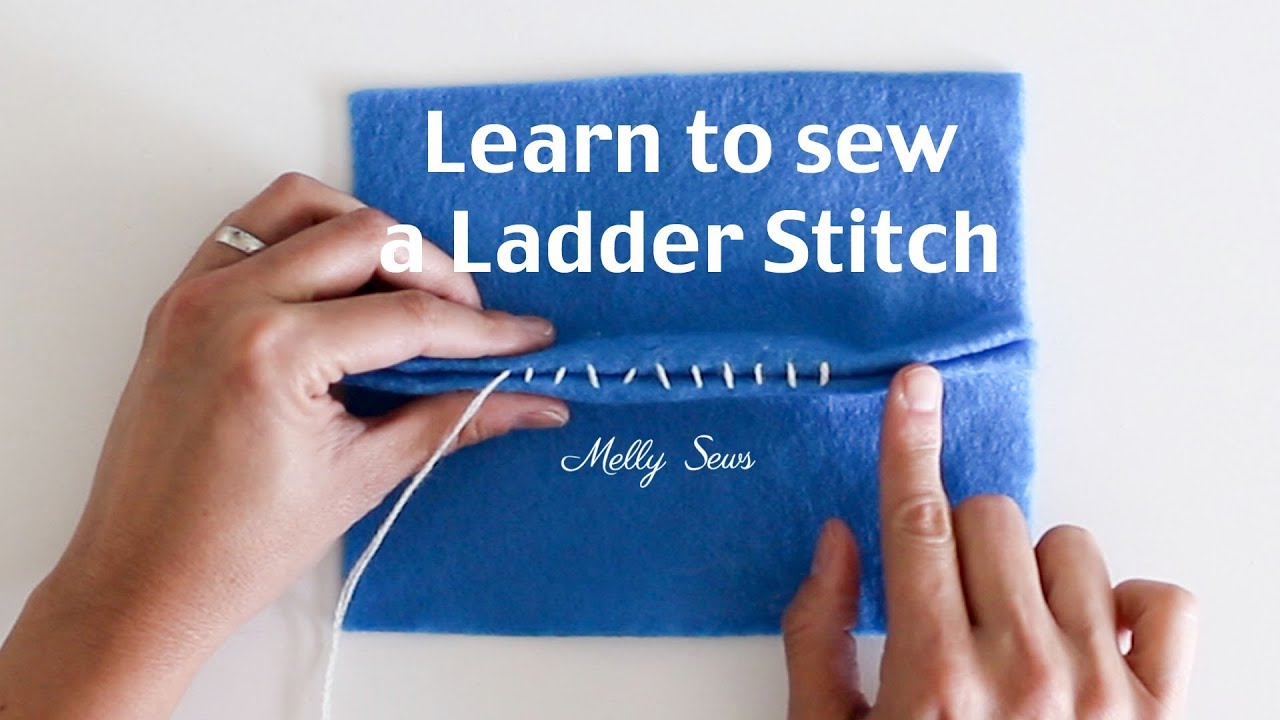
How to Sew a Ladder Stitch - Slip Stitch, Blind Stitch or Invisible Stitch Instructions
→Quote: Courtesy of Melly Sews
Ear pad introduction
Next up is the earpad introduction.
As you can see in my video, this time I’ve chosen the YAXI EARPADS stPad for SONY MDR-CD900st.
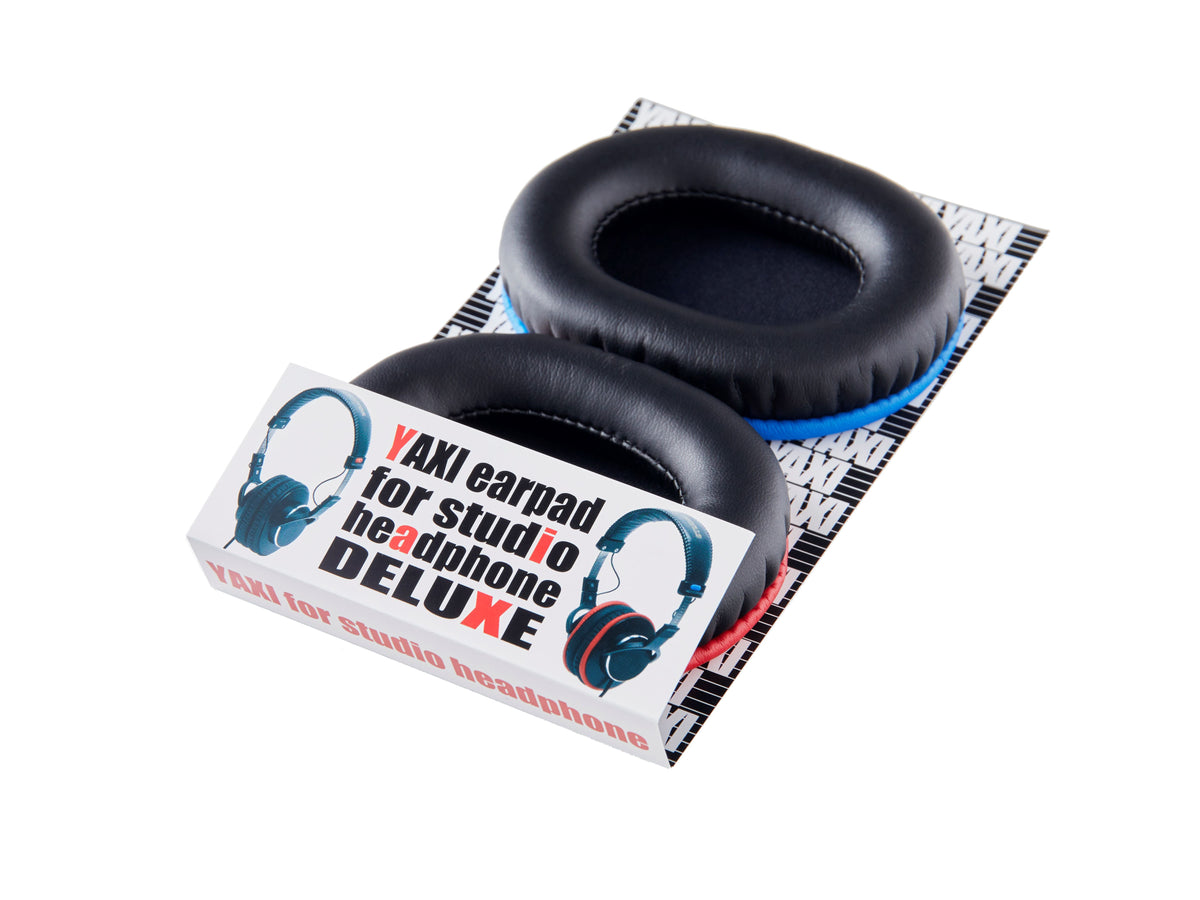
YAXI stPad Earpads Black (for Sony MDR7506)
These ear pads aren’t officially advertised for the MDR-1RBT, but they’ll work just fine—they’ll attach to the MDR-1RBT too.
There are plenty of other cheap ear pads out there, but their durability is questionable.
After that, it’s up to you: either replace cheap ear pads frequently or use expensive ones for a long time.
Check out my video for how to install the ear pads.
Alright then.
See ya.
Note
Machine translation is used for the sentence in this site.
Therefore, the sentence may contain mistranslations.
This site is not intended to cause you any discomfort.
Should any mistranslations appear in the site, I kindly ask for your understanding.